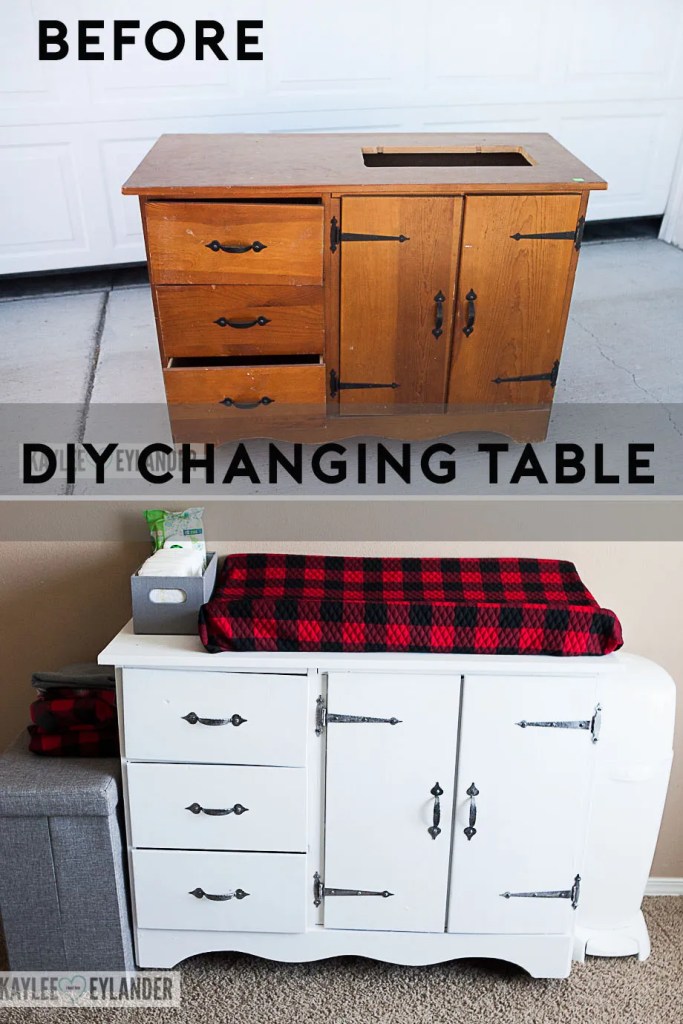
I love painting furniture. I’ve been doing it since my husband and I first got married almost 12 years ago (YAY, Marriage!!). We had no money, well…a little money, and i loved the idea of giving stuff we inherited or found on the side of the road a new life. When I was pregnant with my daughter, I saw an old 80’s China Cabinet on the side of the road with a FREE sign on it. I had Drew whip around and get it for me! He didn’t quite see my vision at the time, but had a hard time saying no to my pregnant plea! We turned it into a closet for our baby…it survived for about 10 years with us, and served us well for all those years.
I LOVE seeing something and imagining what it COULD be. My husband didn’t love it at first, but now he is a garage sale & thrift store die hard, just like myself. I have sent him photos so many times from the Goodwill or my new favorite thrift store, here in West Richland, Penny Pinchers. ( i love it so much that I even did a senior portait session there! ).
This gem of a dresser I found at a Goodwill for $39!!! Originally, I wanted to paint it bright yellow, but couldn’t find the time. It was in my photography studio for a while, waiting for its new destiny. When we picked up and moved to West Richland, Washington, everything was kind of put on hold for a while, and this sweet dresser waited patiently in our garage.
I typically would paint with my favorite latex paint. Then I got on a spray paint
kick, which I still use often.
Then Enter: DIY CHALK PAINT! Eeeeek! Its my new favorite thing!! Why??? ITS SO EASY!!!! I can’t even express the instant gratification factor of Chalk Paint. I love the look of it, but even more than that, I love the ease of painting with it. One reason why it is so easy is that you get to skip past the sanding process. I hated that part. HATED IT! So, by using chalk paint, you are so much closer to the end product when you start!
As you can see in the photo below…I literally painted this thrift store dresser in the middle of my living room. I don’t know if I recommend that method for everyone, but my kids were at school and…I was desperate for a pop of color in my living room.
I saw many recipes for chalk paint on Pinterest, but I ended up kind of modifying it and making up my own. Why? I just saw measuring out a whole cup of paint as a waste of time and paint. So feel free to modify this recipe to your own liking and paint something! ANYTHING!!! 🙂
DIY CHALK PAINT RECIPE:
2 TBSP Plaster of Paris
1-4 TBSP Water
1 cup (ish) of any latex paint of your choice
Stir Stick
Mix 2 TBSP of Plaster of Paris and Water in one of the disposable containers. Add 1 TBSP of water at a time, till the Plaster of Paris is smooth like cake batter. I tried skipping this step and it did make the paint a lot more grainy, so I think this step is pretty important.
Pour your choice of paint into your other disposable container and then add your Plaster of Paris slurry. Mix well. You are ready to paint! No required.
It took me about 2 hrs to paint this whole dresser. 1 coat in some areas, 2 in others. The paint goes on pretty thick, just smooth it our as you go.
I used this recipe to paint my dresser and I actually had leftovers!
I also did a casual coat of wax (Citrus Shield Howard Premium Paste Wax). This product seals and protects the paint…so if your kiddo spills water on it, it won’t soak up into the paint!)
****Update February 2017**** I STILL love this buffet painted this color! The wax seal is perfect and wipes off easily! It has lasted all this time as our office/home central where we toss our stuff!

DIY Chalkpaint Changing Table Dresser Makeover
DIY Papasan Chair Cushion Cover


So you didn’t sand this at all? I have. Dresser I need to paint but it has lots of crevices I don’t know what to do,
Hi AJ! Nope!! I didn’t sand it one bit! Its 4 years later and still looking amazing!! 🙂 Good luck! Let me know how it goes!
Do you know the name of the color you used on this? It’s beautiful!
I will take a peek at the can and let you know!